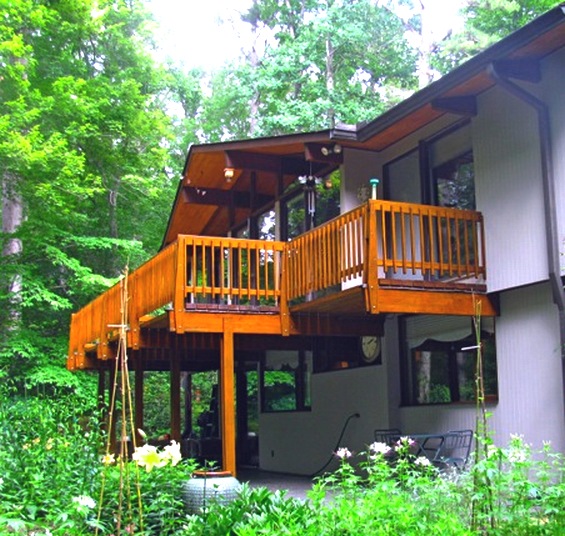
The photographs below give a glimpse of handrail details for a classic period Deck House worked out by the Third Floor Corporation carpentry crew over the course of a series of restorations and reconstructions of these archetypal mid-century houses and their signature raised decks. The overall design is by Benjamin Fiering.
The lead carpenter on the Pepper Pond Deck House restoration featured is Eli Weiner. Materials choices, colors and aspects of the design featured in these photographs were in developed in concert with artist and homeowner Barbara Eyler.
In this project the tapered stanchions (verticals) are of white oak. These were made onsite using a taper jig as part of prototyping this project. Similar stanchions of Mahogany are available by order from Deck/Acorn Company in Acton MA.
The infill baluster panels are made of cold steel flat bar and 1/2″ rod. They are shop primed grey and then oiled with Penetrol.
The cap rails are made of reclaimed Mahogany decking from other projects.
The lower horizontal rails are white oak.
All photography on this page by Ben Fiering, reproduction by permission only.
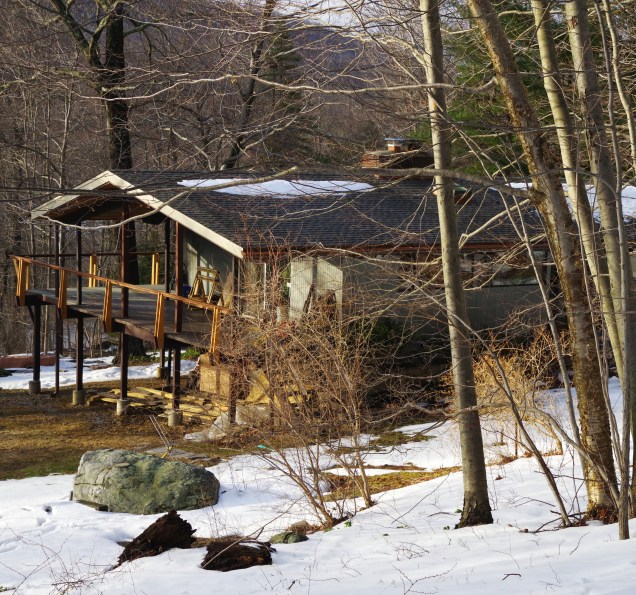
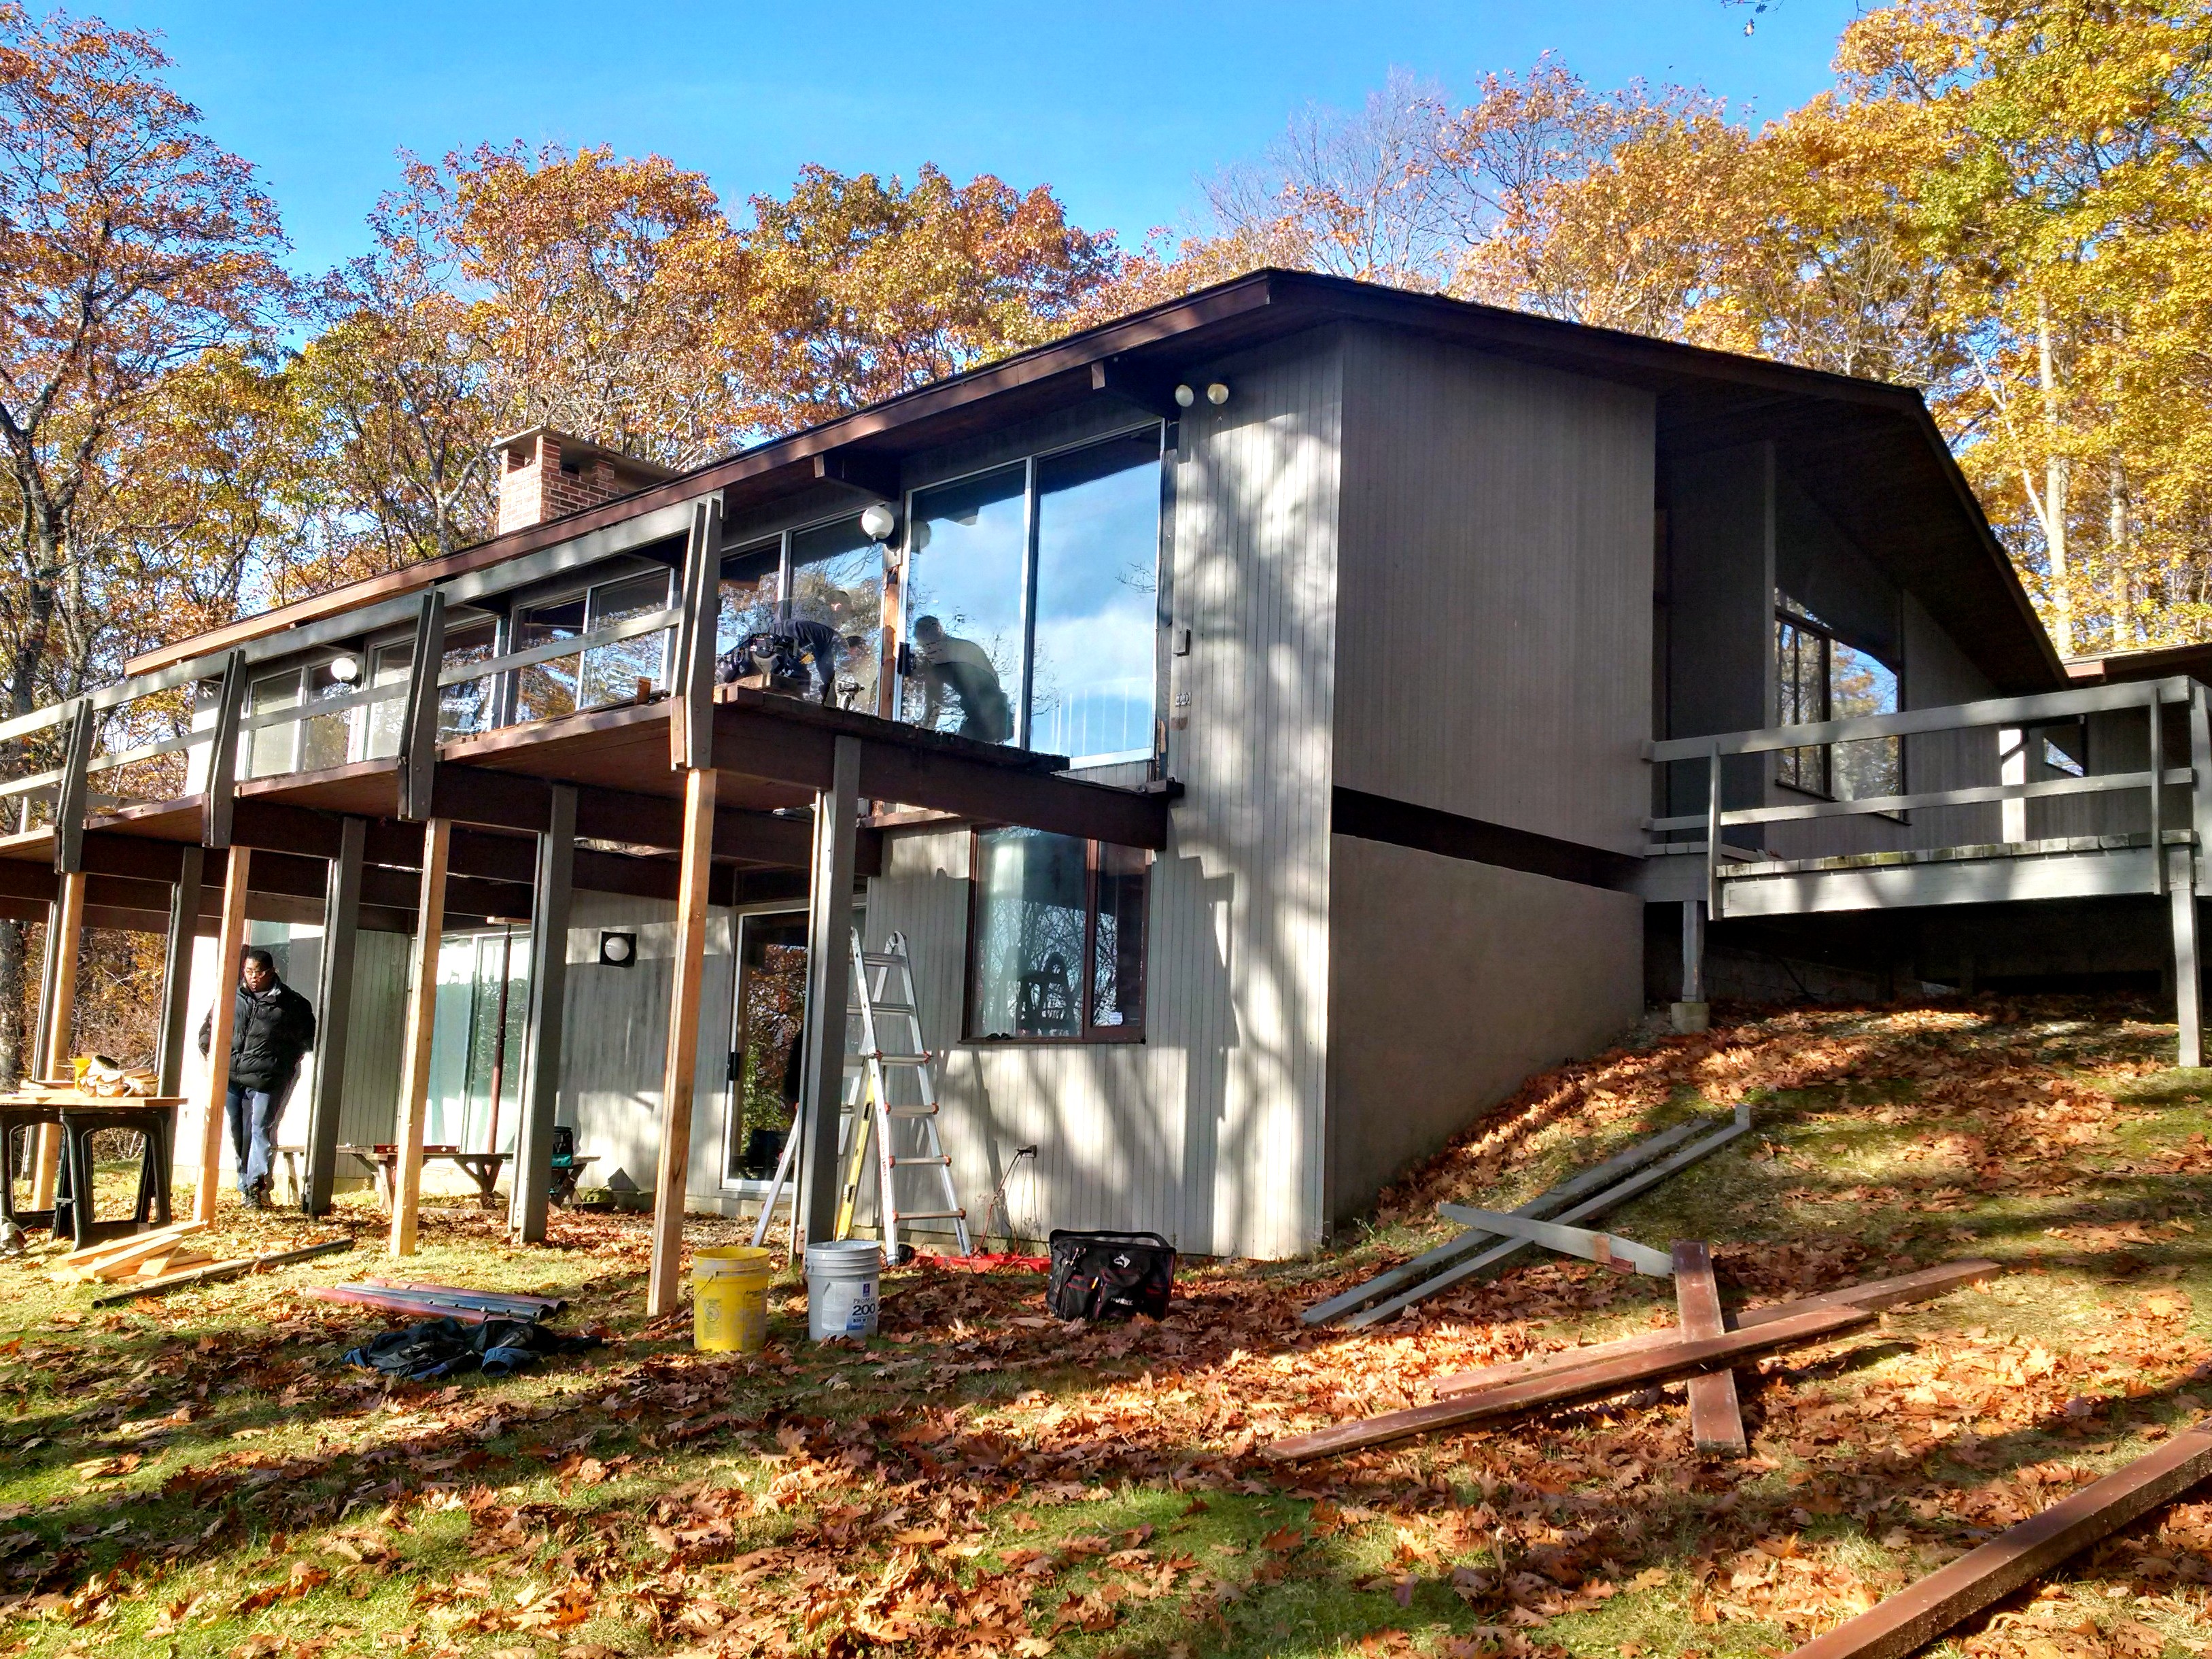
April 2017: Pepper Pond Deck House (1968) restoration in progress, Sherman CT. Design by Barbara Eyler, Benjamin Fiering, Eli Weiner. A Third Floor Project #Thirdfloor #DeckHouse
photo by Ben Fiering
Pepper Pond Deck House (Original construction 1968) restoration in progress, [Scope of work: replace footings and post piers, replace all posts, repair or replace deck substructure as needed, Remove and process, reclaim and replace decking. Handrail stanchions custom white oak. Cap rail reclaimed Mahogany. Roof built up and insulated to r, 50 Hunter Panel Polisosanurate insulation. Retrim roof. Add Copper gutter. Site work and drainage to come. ] April 2017. A Third Floor Corporation project. Design Team Barbara Eyler, Benjamin Fiering, Eli Weiner. Carpentry and structural repair by Gedi Bruce, Mathew Kane, Eli Weiner #Thirdfloor #Deck Housephoto by Ben Fiering
Pepper Pond Deck House restoration Sherman CT. Credits as above.
By Benjamin Fiering with Eli Weiner –Fort Montgomery, NY
March 1, 2015
A “balcony deck” built to Deck House standards. The girders which support the 3×6 Cedar Decking are apart on 8′ centers. The same girders also support the cantilevered elements of the upper floor photo from Triangle Modernist Houses The Williamson House in Raleigh North Carolina
This article describes the process adopted by the Third Floor Corporation construction crew in approaching the structural rehabilitation of a common feature of classic period Deck Houses, the balcony deck. The task is relatively complex because the substructure of these also supports cantilevered elements of the upper level floor and in many cases roof loads . So when decay sets in to the decks on these houses the repair often involves providing structural support to the core elements of the house.
In the past year alone we have repaired versions of the same condition on 5 houses and viewed symptoms of the similar developments in a few others.
This slideshow requires JavaScript.
The method described in this article derives from these recent projects as well as from our experiences in residential construction over the past two decades. We will use photographs and specific details from two recent projects, one in Norwalk, CT and the other in Hillsdale, NY, as the basis to describe our approach. Both of these jobs present in a representative form a condition that I understand to be common to many Deck Houses built from the 1960’s to the 1980’s.Our objective in the case of both houses was it should be with all restorative construction work:
to make a repair that is permanent for all practical purposes, one that is structurally and mechanically equal, if not superior, to the original construction.
to take advantage of the most contemporary methods, materials, tools and knowledge but to appreciate the concepts which informed the original engineering
to preserve the architectural, stylistic, aesthetic, and structural integrity of the house without compromise.
Photo depicts the underside of the Hillsdale balcony deck before the start of construction. Note 1 in the red box shows transition on the underside of floor decking to balcony decking. This beam supports floor, deck and roof loads. The green circle shows moss growing where the siding meets the decking. Click to expand photo
Eli Weiner our lead carpenter in the Upper Hudson Valley region supervised the work at the Hillsdale project, he writes: “This Deck House showed significant structural failing in its south-facing wall. Three of the structural posts connecting the rafters to the deck girders below showed damage, one quite serious. Years of water damage had rotted the bottom of one post away, such that the corresponding rafter above had sunk approximately two inches below the others. Between the posts, 2×4 blocking which made up the sill between the girders and beneath the sliding doors had also suffered damage, and several needed rebuilding. Finally, the cedar deck and its columns were expired, and some ground-floor framing had suffered considerable water damage.”
This slideshow requires JavaScript.
A project of this type must be approached in a a definite order. The first step must be to set up shoring elements to support the critical house structure during demolition. Additional shoring is placed to ensure that the demolition process is controlled and safe for the crew.
As has been described, in a typical Deck House balcony assembly the rafters supporting the roof deck are laid out on the same 8′ on center pattern as the deck balcony girders. 4×4 posts between the sliding doors transfer the roof loads down to the girders. In order to remove and replace the decayed girders and posts the rafters must be supported directly on the interior of the house. In both the Hillsdale and Norwalk jobs we jacked sunken rafters back to their original height slowly during the course of the job. A 2x 8 plate is installed in this photo. This ties the rafters to each other at the bottom to help prevent rollout as the jacks are tightened. This course of jacks is supported from below so that the roof loads are transferred directly to the basement slab. Additional jacks are installed between the girders to support the cantilevered section of the upper floor while the girders are removed. We use heavy duty adjustable steel jacks with a threaded cap. These are very strong and allow for fine and measured adjustment. We also use hydraulic jacks for rapid adjustments or where additional force is needed as well as solid wooden members for static shoring.
Once the core structure of the house has been properly supported and we have used the jacks to relieve the loads from those elements that we will remove and replace, then we begin the basic demolition. Because of the unstable nature of the conditions static shoring has been added to the deck girders while the balcony deck boards are removed.
Eli Writes “We removed the deck entirely, along with the six girders, all of which showed damage on the top face and, more importantly, at the joints with the structural posts above. The six columns supporting the deck were also in bad shape. The 4×4 columns rested on a 2 ” galvanized pipe mount set in below-grade concrete footings. Many of the pipes were terribly corroded, several being nearly rusted through.
Deck used to supply these post mounts as part of their kits. These mounds made of galvanized pipe with a welded stirrup are prone to rust over time and should be replaced where possible on still existing houses.
Indeed, once disconnected from the deck above, one column keeled over from its own (inconsiderable) weight.
The house structural damage had a few consequences: in the interior, the floor had begun to sink at the point of worst damage, and the floorboards had begun to separate. (The most damaged post had also kicked out from the house several inches over six feet.); and the existing mahogany sliding door sill (and the radiator beneath it) had sunk where the post damage was worst, buckling the recessed radiator and deforming the sill.
Our repair began with supporting and tying together the rafters in the interior, along with the first floor girders below, to transfer the roof load from the rotting south-wall posts to jack stands below. After demolishing the deck and removing the existing girders and columns, new footing caps were poured over the existing deck column footings. We erected new girders, and went about replacing and repairing the compromised structural posts. This involved removing two sets of sliding doors and their frames, in order to remove the existing posts and rebuild the 2×4 sills between.”
Hillsdale NY, Deck House Gerald Moore and Eli Weiner shown working in photograph. Deck girders are shored prior to deck surface removal
Due to the weight of the 4×12 girders and their critical attachments which penetrate the house we approach their removal carefully. If one kicked suddenly loose, aside from potentially injuring a worker or collapsing elements of the shoring, the leverage from a shifting girder still embedded in the house walls or directly supporting a load bearing column could cause significant damage to the house. After shoring the girders we remove the old decking.
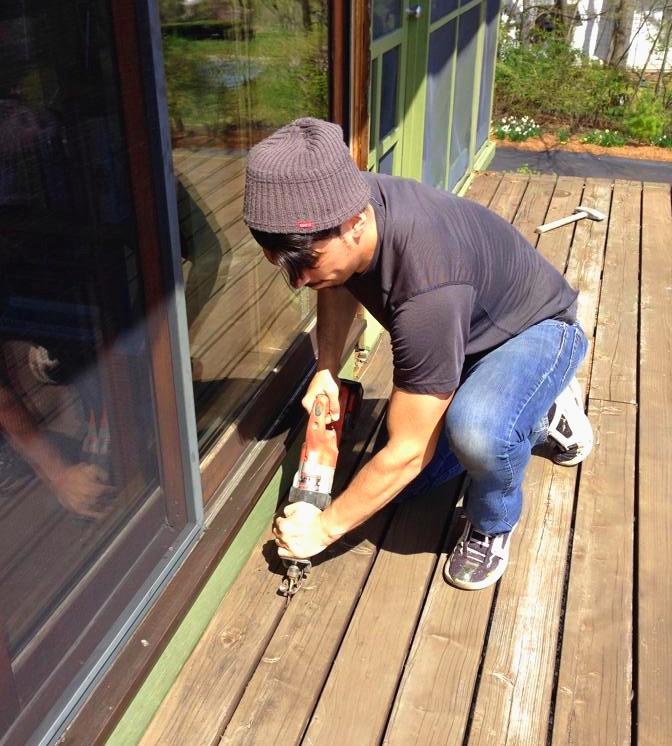
Carpenter Mike Roldan cuts the through nails on Deck House Balcony here using a sawzall. A grinder with a metal cutting wheel is also convenient for this task. Once the through nails have been cut the boards can be lifted off the girders with a crowbar. The deck surfaces on a Deck House which has been built to specification perform greater structural work than so on a conventional stick framed deck. Their removal should be conducted with care and the sub-structure properly shored against lateral movement to avoid injury or damage.
The decks on these houses are constructed of 3×6″ solid cedar timbers. They are fastened to each other with 10″ long nails through the sides of the boards and span eight feet without intermediate support on the finished decks. A hardened rubber spacer is installed with the nails to maintain equal spacing and to provide weather protection for the exposed nail shank. The deck boards are also typically ‘toe-nailed’ (nailed at an angle) from the side faces down to the girders.
Note the thickness of the lumber on this Deck House Pleasantville NY. Standard decking on stick built houses is 5/4″ nominal, about 1″ thick actual, whereas the solid cedar decking provided by Deck House is 12/4″ actually about 2 5/8″ thick. Due to the thickness of the material it is possible to reclaim a significant portion of the removed decking for future use. This stair is built entirely of reclaimed cedar decking from the upper level deck which was replaced with new material. Photograph and stair carpentry by Third Floor apprentice Israel Mermelstein
Once the decking has been removed then the damaged girders can be cut away. It is best to conduct this task by supporting the girders and through cutting them into smaller pieces. Then the remaining short ends can be removed from their insertion points at the house. At this stage jacks and shoring directly supporting the girders are replaced with jacks supporting the floor loads on either side of the beams. If the rafters have been properly shored and jacked to relieve pressure on the columns which are between the sliding doors then the floor loads on the two foot or so cantilevered section are relatively light. Still they must be supported to avoid shift of interior finish work. In many of the houses, as is the case in both the Hillsdale and Norwalk, houses a heating element runs beneath the sliding doors in a small sill. As is shown and described above often the decay has spread to the whole insertion point of the girders, the post bases and the built up sill under the sliding doors. This shoring which, once the roof is supported, only supports a small area of the floor and the sliding doors themselves may have to be moved and repositioned several times as decayed sections of the sill are replaced. It is advisable to remove the glass panels of the sliding doors in order to relieve weight from these positions as well. The frames may or may not need to be removed and or replaced depending upon their condition. If needed Deck House makes available suitable replacement parts for these elements.
This photograph shows our Norwalk project with the decking and girders fully removed except for the beam ends which at this stage still support the cantilevered floor. From this point the floor is supported by jacks on either side of the girder ends and the approximately two foot remaining beam sections can be easily removed. Photo by Ben Fiering
It is advisable to remove the glass panels of the sliding doors in order to relieve weight from these positions as well. The frames may or may not need to be removed and or replaced depending upon their condition. If needed Deck House makes available suitable replacement parts for these elements.
Now that the shoring critical demolition and as needed repairs to the interior tongue and groove floor decking and sills is complete new structural girders must be installed in the old insertion points. On both of the jobs described the footings supporting the outer deck columns were also replaced or substantially repaired. The builder in this case must keep in mind that these footings support not just the deck but major portions of the house and roof loads, snow in the winter etcetera. Also, due to the nature of the construction rigid post connections at the ground and at the top of the columns where they meet the girders is desirable.
In Norwalk we used 12″ diameter Sonotube with a 28″ diameter Bigfoot footing base, the concrete was steel reinforced.
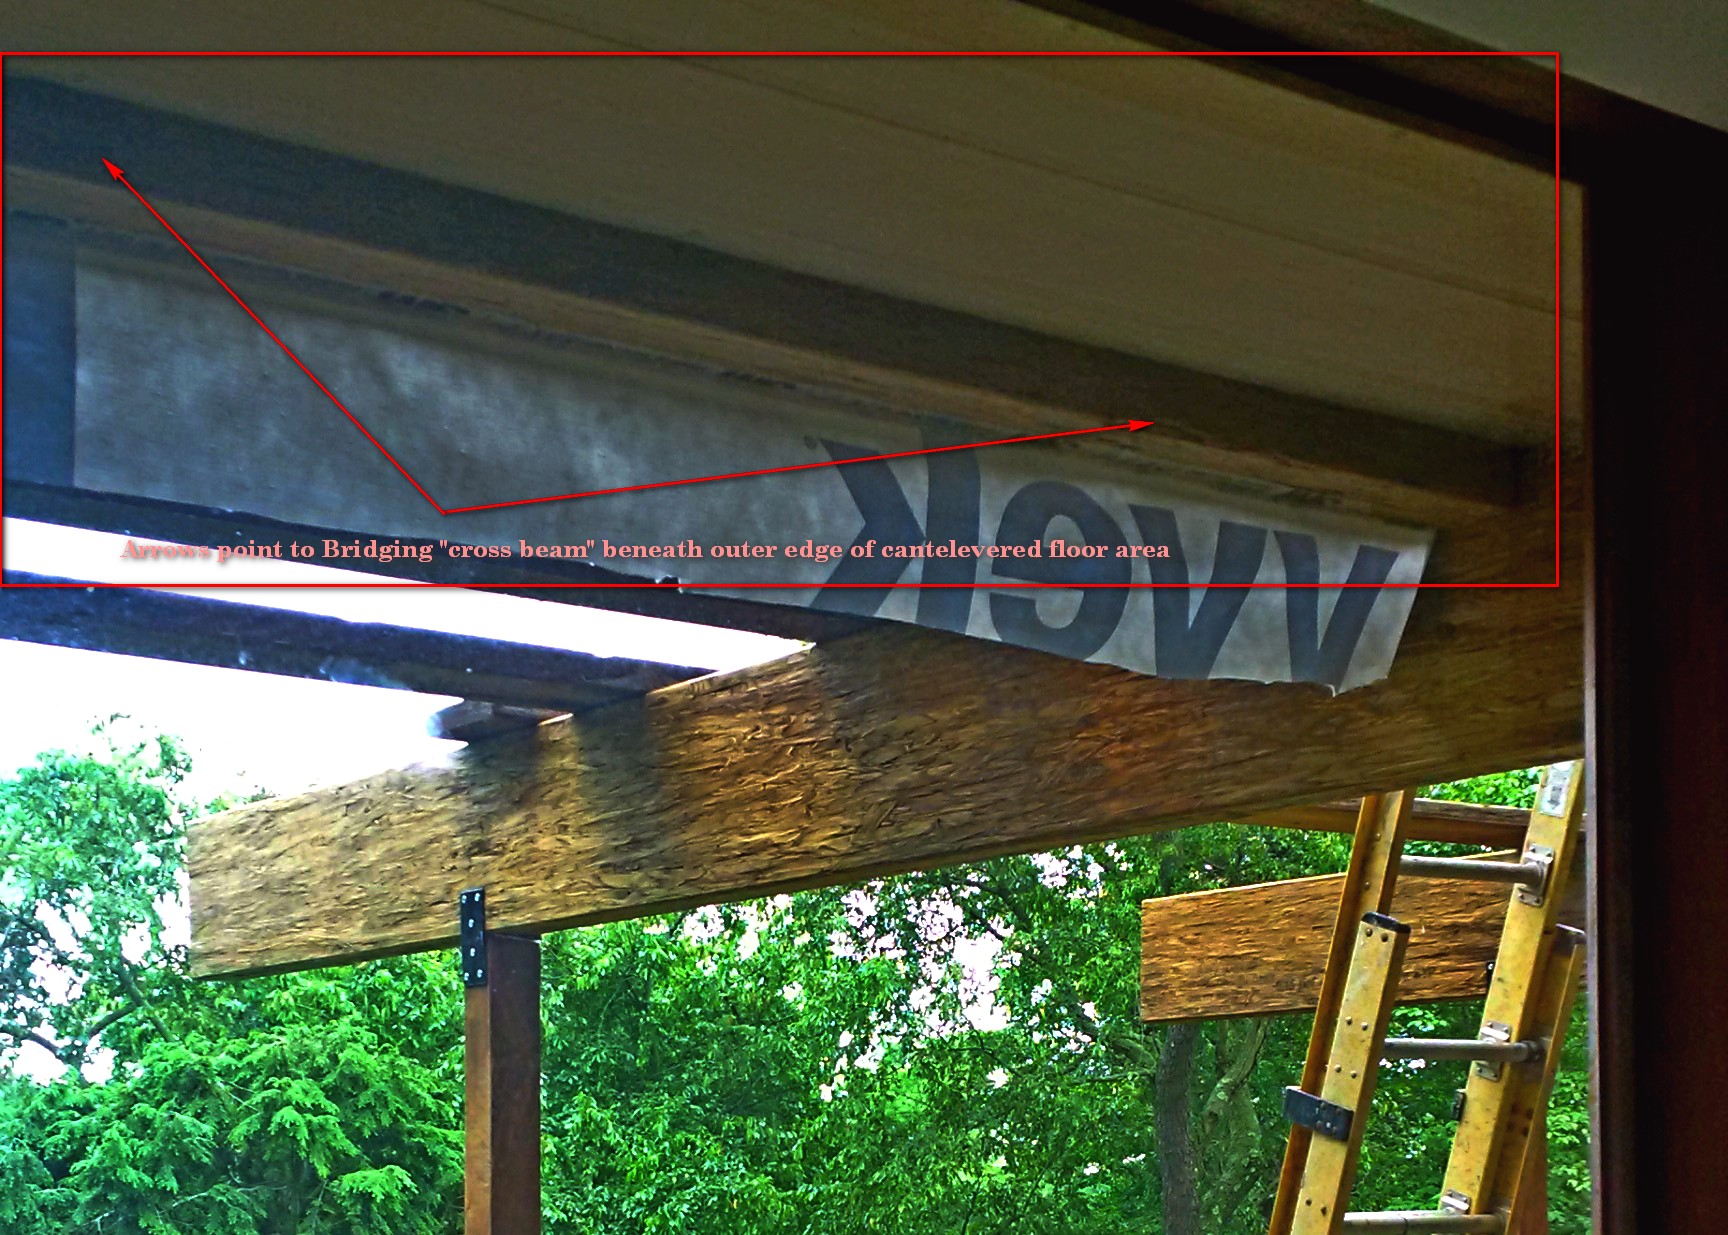
Our process was to complete any concrete work prior to installing the new girders but to leave the finish posts off at the first stage of assembly and to support the new beams on rigging and scaffholding until proper levels were established and the new frame was relatively rigid. On both jobs we added an element not typically found in Deck House construction of the classic period. this is an horizontal “cross beam” or bridging of pressure treated 4×6, directly below the sliding doors at the face of the house below the tongue and groove floor decking and half notched over the girders.
arrows point to bridging click to enlarge
This element is added to improve rigidity of the deck frame and to resist any tendency to shift or bow beneath the sliding doors. It is slightly noticeable as a small coffer from interior windows looking out underneath the deck and unseen from any other vantage point.
It is desirable to consider priming and flashing or otherwise weather protecting critical areas of the girder and cross beam assembly before they are installed as access to some of these points may be difficult once the beams are inserted into the house.
In Norwalk we used 4″x 12″ PSL (parallel stranded lumber) to replace the original girders. The posts used here are Solid ipe 4×4’s. 12″ cylindrical footings can be seen in this photo as well as custom metal connectors made by Garrison Forge. The “cross beams” or bridging mentioned in the article are behind the Tyvek housewrap in this photo. Before the flashing and decking was installed these beams were coated with a brown tinted Sherwin Williams “Adhesion Primer.” at this stage of the job the posts which support the window rafters and which lie between the sliding doors were also replaced or repaired as needed.
Before the Decking was installed we carefully and thoroughly flashed the beam insertion points. The bases of the new columns were coated in flashing cement and all potential water penetration areas were flashed or treated using a combination of Grace Vycor Black Jack or other bituminous flashing cement, and metal flashing. It is easiest to complete trim work against the house before the decking is installed or to leave out 1 or two courses of the decking to allow for future treatment. At the deck line we transitioned from cedar trim material to Hardi fiber-cement based products in order to inhibit organic activity water absorption and decay.
The tops of the girders were also treated with multiple layers of flashing including in order from the surface to above:
Photo shows upper level cantilever resting on newly installed girder. Bridging at edge of house is also visible in this photo. by Ben Fiering
A layer of Grace Vykor or ice and water shield or similar applied directly to the primed surface of the wooden girder;
a layer of Black Jack flashing cement in which was placed on each side of the girder a typical 4″ roof eave drip edge between the drip edges a bead of Black Jack was also run.
Atop the drip edge we placed a 3/8 by 2 1/4″ white oak nailing strip also set on the flat in the black jack tar.
The nailing strip serves to elevate the cedar decking from the relatively wide beams and helps to prevent water pooling under the Deck boards by allowing runoff. Also the nailing strips protect the flashing on top of the girders during the installation process. Without these the metal drip edge would surely be damaged and the waterproofing disturbed during the placement of the boards. White Oak has a natural weather resistance and is a very strong material allowing its use in this thin application.
Photo shows newly installed cedar decking with flashing and nailing strip assembly. The first courses have been left off to allow detailing at the edge of the house. Unlike the original installation we will not nail the first course in to the house sill. In keeping with contemporary practice we will allow ample space for air flow between the house and the start of the decking.In this photo the metal drip edge at the top of the girders can be seen. The girders have been primed two coats with a high quality adhesion primer and the posts are sealed and stained. The cedar decking was finished on all sides and the ends using Duckback Superdeck.
.
The rest of the decking is installed following the methods of the original houses. The boards are blind toe nailed through the sides down into the girders. We recommend piloting the nail holes and using a punch in order to minimize the damage of hammering to the cedar boards. We also seal the nail penetrations with an oil sealer or a little Black Jack in a caulking gun to minimize weather penetration at the nail insertion point. The boards are through nailed from the sides into each other at approximately 30″ centers with the spacers placed so that the nails penetrate the spacer and enter the adjacent board. These nails must be piloted due to their length and the importance of controlling the point of entry to the next board. Another article can discuss in greater detail the decking installation. Deck House also has materials and diagrams available to the homeowner or builder approaching this task.
It should be stated that though Third Floor Corp has a productive and friendly relationship to Deck/Acorn, we do not in any way represent their company. The opinions and methodologies described in this article are solely those of the authors and editor of of the Doctor Structure Blog. The circumstances of each house is different. Each Deck House has its own characteristics. Structural work of the type described in this article should be attempted by experience persons or under the supervision of a master builder or professional engineer.
Comments on this article, constructive criticism, questions or additional contributions are encouraged. Readers wishing to submit a word press article to this blog for publication should send a copy by email to doctorstructure@thirdfloorconstruction.com.
A Deck House has several identifying characteristics, including natural finish materials such as mahogany and slate, that differentiated them from other manufactured homes of mid-century America. Today, casual observers might notice their low-slung gable roofs with wide overhangs, or cantilevered second-story volumes that connect to outdoor patios. Contemporary occupants, meanwhile, enjoy the drama of vaulted interiors featuring tongue-and-groove ceilings and a fluid indoor-outdoor dialogue courtesy of sliding glass doors, numerous windows, and screen porches.
Architect Rick Renner, who has mentally cataloged myriad Deck Houses, says of this latter quality, “Properly done, Deck Houses provide homeowners with a really nice relationship to the landscape.”. Text above is linked to complete article.
Deck Houses, still in production today holds a special place in the history of mid-century residential architecture Below are some links for Deck House enthusiasts, owners, builders or students of residential architectural style.